Postagens

Renomeando dispositivos USB em linux

Imagem
  sudo fdisk -l Este comando mostrará os disco rígidos e os discos amovíveis ligados ao PC e no que respeita à pen USB que tinha ligada, disse-me algo como: ... Disk /dev/sdd: 2055 MB, 2055208960 bytes 16 heads, 32 sectors/track, 7840 cylinders Units = cylinders of 512 * 512 = 262144 bytes Disk identifier: 0x00000000 Device Boot Start End Blocks Id System /dev/sdd1 1 7840 2007024 e W95 FAT16 (LBA) Reparem acima que a tal pen USB está ligada no /dev/sdd1. Sendo assim podemos renomeá-la para o que quisermos: sudo mlabel -i /dev/sdd1 ::NOME_GIRO

Navegador padrão

Imagem
update-alternatives --install /usr/bin/x-www-browser x-www-browser /usr/bin/firefox 50 update-alternatives --config x-www-browser Existem 2 escolhas para a alternativa x-www-browser (disponibiliza /usr/bin/x-www-browser).   Selecção   Caminho                 Prioridade Estado ------------------------------------------------------------   0            /usr/bin/google-chrome   200       modo automático   1            /usr/bin/firefox         50        modo manual * 2            /usr/bin/google-chrome   200       modo manual Pressione enter para manter a escolha actual[*], ou digite o número da selecção: 1

Criando uma sessão exclusiva para o navegador

Imagem
Deixar um visitante ou familiar navegar na web em sua máquina, sem o medo dele apagar ou acessar arquivos importante. apt-get install openbox openbox-themes fbpanel pcmanfm firefox nano /usr/share/xsessions/Visita-Session.desktop [Desktop Entry] Name= Visita Exec= Visita-Session nano /usr/bin/Visita-Session #!/bin/sh openbox-session& fbpanel& nm-applet& firefox chmod +x /usr/bin/Visita-Session Sem Menu de contexto aria de trabalho. mv /etc/xdg/openbox/menu.xml /etc/xdg/openbox/menu.xml_BK nano /etc/xdg/openbox/menu.xml <?xml version="1.0" encoding="UTF-8"?> <openbox_menu xmlns="http://openbox.org/" xmlns:xsi="http://www.w3.org/2001/XMLSchema-instance" xsi:schemaLocation="http://openbox.org/ file:///usr/share/openbox/menu.xsd"> <menu id="root-menu" label="Openbox 3"> #####################################################################

Otimizar flash firefox linux

Imagem
mkdir /etc/adobe nano /etc/adobe/mms.cfg  AssetCacheSize = 100 AutoUpdateDisable=1 OverrideGPUValidation=1 ProtectedMode=0 WindowlessDisable=1 LocalStorageLimit = 5 LocalFileLegacyAction = 1 ThirdPartyStorage = 1 AS3SSE = 1 LocalStorageLimit = 5 Reinicia o firefox 

Criar pacote java oracle .deb

Imagem
# apt-get update && apt-get install java-package && exit $ make-jpkg jre*.tar.gz $ su # dpkg -i oracle*.deb # cd /usr/lib/mozilla/plugins # ln -s /usr/lib/jvm/jre-8-oracle-x64/lib/amd64/libnpjp2.so   ############################################################### # opcional # apt-get remove --purge openjdk-* # apt-get autoremove --purge -y ############################################################### # update-alternatives --config java Escolha o número adequado para a alternativa desejada.  O binário java adequada será automaticamente no PATH em virtude de a alternativa link simbólico /usr/bin/java. java -version criar atalho nano /usr/share/applications/java.desktop [Desktop Entry] Name=Java Web Control Panel Comment=Configure java (javaws and plugin) Exec=/usr/bin/ControlPanel Icon=/usr/lib/jvm/jre-8-oracle-x64/plugin/desktop/sun_java.png Terminal=false Type=Application Categories=Settings;

Firewall para seu PC iptables Linux ipv6

Imagem
#!/bin/sh ### BEGIN INIT INFO # Provides:          firewall # Required-Start:    $remote_fs $syslog $network # Required-Stop:     $remote_fs $syslog $network # Default-Start:     2 3 4 5 # Default-Stop:      0 1 6 # Short-Description: Starts and stops Firewall # Description:       Starts and stops Firewall, a network firewall ### END INIT INFO iniciar(){ sleep 3 # Defina suas variáveis de comando IPV4="iptables" IPV6="ip6tables" #----------------------------------------------------------------------------------#                               # Prioridade de portas # #----------------------------------------------------------------------------------#  PORT_TOS="80,443"  $IPV4 -t mangle -A OUTPUT -p tcp -m multiport --dports $PORT_TOS -j TOS --set-tos 16 # ipv6  $IPV6 -t mangle -A OUTPUT -p tcp -m multiport --dports $PORT_TOS -j TOS --set-tos 16 #-----------------------------------------------------------------------------

Como ativar as teclas de volume no LXDE

Imagem
Por padrão, o LXDE vem com as teclas mudo, aumentar volume e abaixar volume desativadas. Para ativá-las, basta adicionar as seguintes linhas ao arquivo ~/.config/openbox/lxde-rc.xml , no final da seção <keyboard>, logo acima de onde está escrito </keyboard>:   <keybind key="XF86AudioMute">     <action name="Execute">       <command>amixer sset Master toggle</command>     </action>   </keybind>   <keybind key="XF86AudioRaiseVolume">     <action name="Execute">       <command>amixer sset Master 5%+</command>     </action>   </keybind>   <keybind key="XF86AudioLowerVolume">     <action name="Execute">       <command>amixer sset Master 5%-</command>     </action>   </keybind> openbox --reconfigure

Bloquear um arquivo/diretório Linux

Imagem
Para bloquear um arquivo: # chattr +i arquivo Para bloquear um diretório: # chattr +i diretorio/ Para liberar um arquivo: # chattr -i arquivo Para liberar um diretório: # chattr -i diretorio/ Obs.: quando bloqueia um arquivo, você não conseguirá fazer mais alteração nenhuma, nem mesmo se estiver logado como root. Uma vez bloqueado, você só conseguirá alterar o arquivo/diretório desbloqueando o arquivo.

Trocar imagem login LXDE

Imagem
Edite o arquivo leafpad /etc/lightdm/lightdm-gtk-greeter.conf # background = Background file to use, either an image path or a color (e.g. #772953) # theme-name = GTK+ theme to use # icon-theme-name = Icon theme to use # font-name = Font to use # xft-antialias = Whether to antialias Xft fonts (true or false) # xft-dpi = Resolution for Xft in dots per inch (e.g. 96) # xft-hintstyle = What degree of hinting to use (none, slight, medium, or hintfull) # xft-rgba = Type of subpixel antialiasing (none, rgb, bgr, vrgb or vbgr) # show-indicators = semi-colon ";" separated list of allowed indicator modules. Built-in indicators include "~a11y", "~language", "~session", "~power". Unity indicators can be represented by short name (e.g. "sound", "power"), service file name, or absolute path # show-clock (true or false) # clock-format = strftime-format string, e.g. %H:%M # keyboard = command to launch on-screen k

PCManFM Miniaturas de videos Debian

Imagem
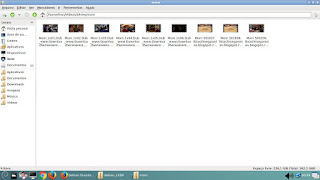
apt-get install ffmpegthumbnailer leafpad ~/.config/libfm/libfm.conf thumbnail_max=0 procure por pref.ui EX : fran@Debian:~$ locate pref.ui /usr/share/lxpanel/ui/panel-pref.ui /usr/share/pcmanfm/ui/desktop-pref.ui /usr/share/pcmanfm/ui/pref.ui edite o arquivo /usr/share/pcmanfm/ui/pref.ui <object class="GtkAdjustment" id="a djustment1"><property name="upper">32768</........ para <object class="GtkAdjustment" id="a djustment1"><property name="upper">0</........ chmod 777 /usr/bin/ffmpegthumbnailer como usuario comum esse último comando rm -Rf ~/.thumbnails/* OBS:muito importante "reinicie o Pc" ############################################## Opcional para miniaturas rmvb,mp3 etc cd /usr/share/thumbnailers mv ffmpegthumbnailer.thumbnailer ffmpegthumbnailer.thumbnailer_BK leafpad ffmpegthumbnailer.thumbnailer copie, cole e salve [Thumbnailer

Musicas, Radio e Videos no Terminal LXDE

Imagem
Radio músicas vídeos no shell scritp su apt-get install mpg123 mplayer cd  /usr/local/bin   nano play #!/bin/bash ## 09/02/2013 ## Crédito Fran ## Debian 7.0 ## apt-get install mpg123 mplayer ## Versão 1.2 notify-send -i applications-multimedia "Play Shell" # Especificando o player a ser utilizado. PLAYER="/usr/bin/mpg123" PLAYER2="/usr/bin/mplayer" LIMPAR="clear" # Gerenciador de arquivos WIN="pcmanfm" # Cache rádio online CH="-cache 512" # Otinizar volume VOL="-af volume=5db" # Cor # Fim F="$(tput sgr0)" # Amarelo A="$(tput bold ; tput setaf 3)" # Vermelho V="$(tput bold ; tput setaf 1)" # Branco B="$(tput bold ; tput setaf 7)" # Verde VR="$(tput bold ; tput setaf 2)"     while true; do     $LIMPAR     echo $B" *****************************************************"$F     echo $B" *    Estação Rádio ou Pasta de Músicas ou Videos

Como instalar o debian sem problemas de driver use Firmware Não-Livre

Imagem
Vc tem que baixar Firmware Não-Livre, vc extrai na "raiz" de uma partição ou em um pendrive na "raiz". http://cdimage.debian.org/cdimage/unoffi.../firmware/ Só instalar o debian. https://www.debian.org/CD/http-ftp/ OBS:: “Firmware Não-Livre” em algum momento você tem que colocar o pendriver com os Firmware Não-Livre ou já no começo do boot usb https://debian-handbook.info/browse/pt-BR/stable/sect.installation-steps.html

Login automático LXDE

Imagem
Editar como root o arquivo leafpad /etc/lightdm/lightdm.conf # autologin-guest = True to log in as guest by default # autologin-user = User to log in with by default (overrides autologin-guest) Altere para  autologin-guest=true autologin-user=nome_do_seu_usuário

Compilar kernel Debian

Imagem
Compilar kernel Personalizado. Leia tudo com atenção. A abra o terminal em tela cheia. O terminal menos que 80 linhas dara erro na hora do menu de configuração. su apt-get install build-essential bin86 binutils bison fakeroot flex kernel-package libncurses5 bzip2 libncurses5-dev git mesa-utils module-assistant libgl1-mesa-dri dkms Limpar cache do apt apt-get clean ls /usr/src Entre na pasta do kernel cd /usr/src/linux-x.x.x make clean Agora escolha uma forma  modolo ou dentro do kernel. compila em modolo # make localmodconfig  ou compila dentro do kernel # make localyesconfig Abri menu só salve e saia ou faz algumas alterações no kernel. make menuconfig make clean Compilar e empacotar INSTALL_MOD_STRIP=1 CONCURRENCY_LEVEL=3 fakeroot make-kpkg --initrd --append-to-version=-debian-64bits-fran --revision=1975 kernel_image kernel_headers Na pasta estar dois pacotes .deb e só instalar. linux-headers-4.5.0-debian-64